Showing posts with label invites. Show all posts

Monday, August 29

DIY Deets - Invites pt. 2: Pocketfold Assembly

I hope you're sufficiently rested from all that pocketfold prep. This next part will be more gratifying because you'll have a finished product to show for your work! Shall we get started?


Step 7: Host an invite-making party! 
For extra motivation, set up an afternoon where willing friends come over to lend their helping hands. I asked fellow Hive members, fully knowing that I'll be happy to reciprocate the favor. An incentive of homemade cupcakes and cookies sweetens the deal.


{ My invitation angels, BreezyBri19 and Miss Godiva }

Step 8: Affix ribbon to the folder.
I used clear photo mounting tabs on the top and bottom of the ribbon. Wrap the ribbon around the outside of the folder and stick the ends to the inside. One end will overlap the bottom edge where the pocket goes. The other end covers the top flap and comes down over the invitation panel crease.


Step 9: Mount pocket to the inside bottom panel of the folder.
Run double-sided adhesive down the three 0.5 inch tabs. Line up the corners and attach to the bottom edge of the folder. Press down to ensure a good seal, especially around the ribbon.


Step 10: Adhere the invitation to the inside center panel of the folder.
Run double-sided adhesive down the top and bottom of the invitation card's back side. Carefully line up the card in the center panel of the folder and press to make it official. 

Bonus Step: Round the corners.
This simple extra step transforms the original 12x12 paper into a finished pocketfold. Ta-da!


And that is how you make my semi-DIY pocketfold invitation! Still to come, RSVP and map cards and wraparound address labels for the envelopes.


If you've made it this far, thank you and congrats! My process is pretty involved and the results are totally worth it, I promise.

Sunday, August 28

DIY Deets - Invites pt.1: Pocketfold Prep

Aloooooooha, Hive! This little Teacup has been a busy bee. W-Day looms a handful of weeks away, inspiring a flurry of wedding-related preparation. Yay!


In the midst of bouncing around from project to project, I've neglected to keep you caught up on all our W-Day progress. No more - I've brewed a cup of my favorite hot green tea and put myself on DIY timeout to get back to writing. Blogging counts as wedding activity, right?!


I left off last week promising a detailed tutorial of our invites, post-reveal. Let's start at the very beginning. I hear it's a very good place to start. Thanks, Maria.


Image via Dvdizzy / Credit: "The Sound of Music," Dir. Robert Wise, 1965, film.


Step One: Source your invitation cards.
I chose to leave this first step to the professionals. After scouring the internet for inspiration, I ended up with 122 different designs saved to a folder on my computer and yet nothing felt quite right. It may be because our wedding didn't (and still doesn't) have a specific theme, so I had to dig deep to find the perfect cards. My new favorite designer is Vera Wang after registering for her china dinnerware. Luckily enough, she also has a line of invitations through William Arthur. Even better, the line is sold through Papyrus in the mall! 


Letting the invitation specialists do what they do best saved me untold levels of anxiety and stress. When there was a spelling error on the proof, it was their mistake to fix. I took advantage of a 20% off promotion and ordered them in March. One swipe of my credit card and the invitations were printed. A few weeks later I picked up the boxes, so much more lovely than I expected. Happy dance!


{ personal photos }


** WARNING! ** The next phase of my invite process is VERY time consuming. These steps are not meant to be finished in one sitting . . . impossible unless you're only making a handful. You will need a lot of free time to make them, and it helps to ask others to join in on the paper crafting fun so you maintain a happy attitude in the process. Make little batches in an hour here and there. Otherwise, you'll be up until 4am on the eve of your bachelorette weekend finishing them and wishing you had heeded more of your own advice!

Step 2: Gather supplies for pocketfold envelopes.
I decided to forgo envelope liners in favor of pocketfolds. Our wedding location will be a destination for many of our guests and they can keep all the info together in an easy to carry folder. Mrs. Deviled Egg's tutorial demonstrated how to make one from a piece of 12x12 cardstock and I referred to her post many times during this process. She also advises having a few months of time to make them before you need to send them in mail. Great tip!


My supplies: Broken down into two areas . . .consumables and hardware.

  • 12x12 cardstock, enough for 1 sheet per invitation. I spent several weeks waiting for paper to go on sale at Michaels and also purchased in bulk from scrapbook.com during a one-day sale. The paper I used was Bazzill Basics in Tiara, which retails for 69 cents per sheet. By waiting for the sales, my cost was approximately 40 cents each. Total cost = $56.00.
  • Ribbon. Instead of a belly band, I fastened a double ribbon around the outside of the pocketfold and secured it under the invitation card and pocket. Again, I used sales to defray the cost.
  • Photo mounting tabs, clear. I used two per invite to affix the ribbon to the pocketfold, 
  • Double-sided adhesive. This holds the invitation and pocket in place, very important to use a high quality brand so your hard work doesn't fall apart.

{ Hardware }
  • Paper trimmer
  • Scoring board and bone folder
  • Ruler
  • Adhesive tape gun
  • Round corner punch


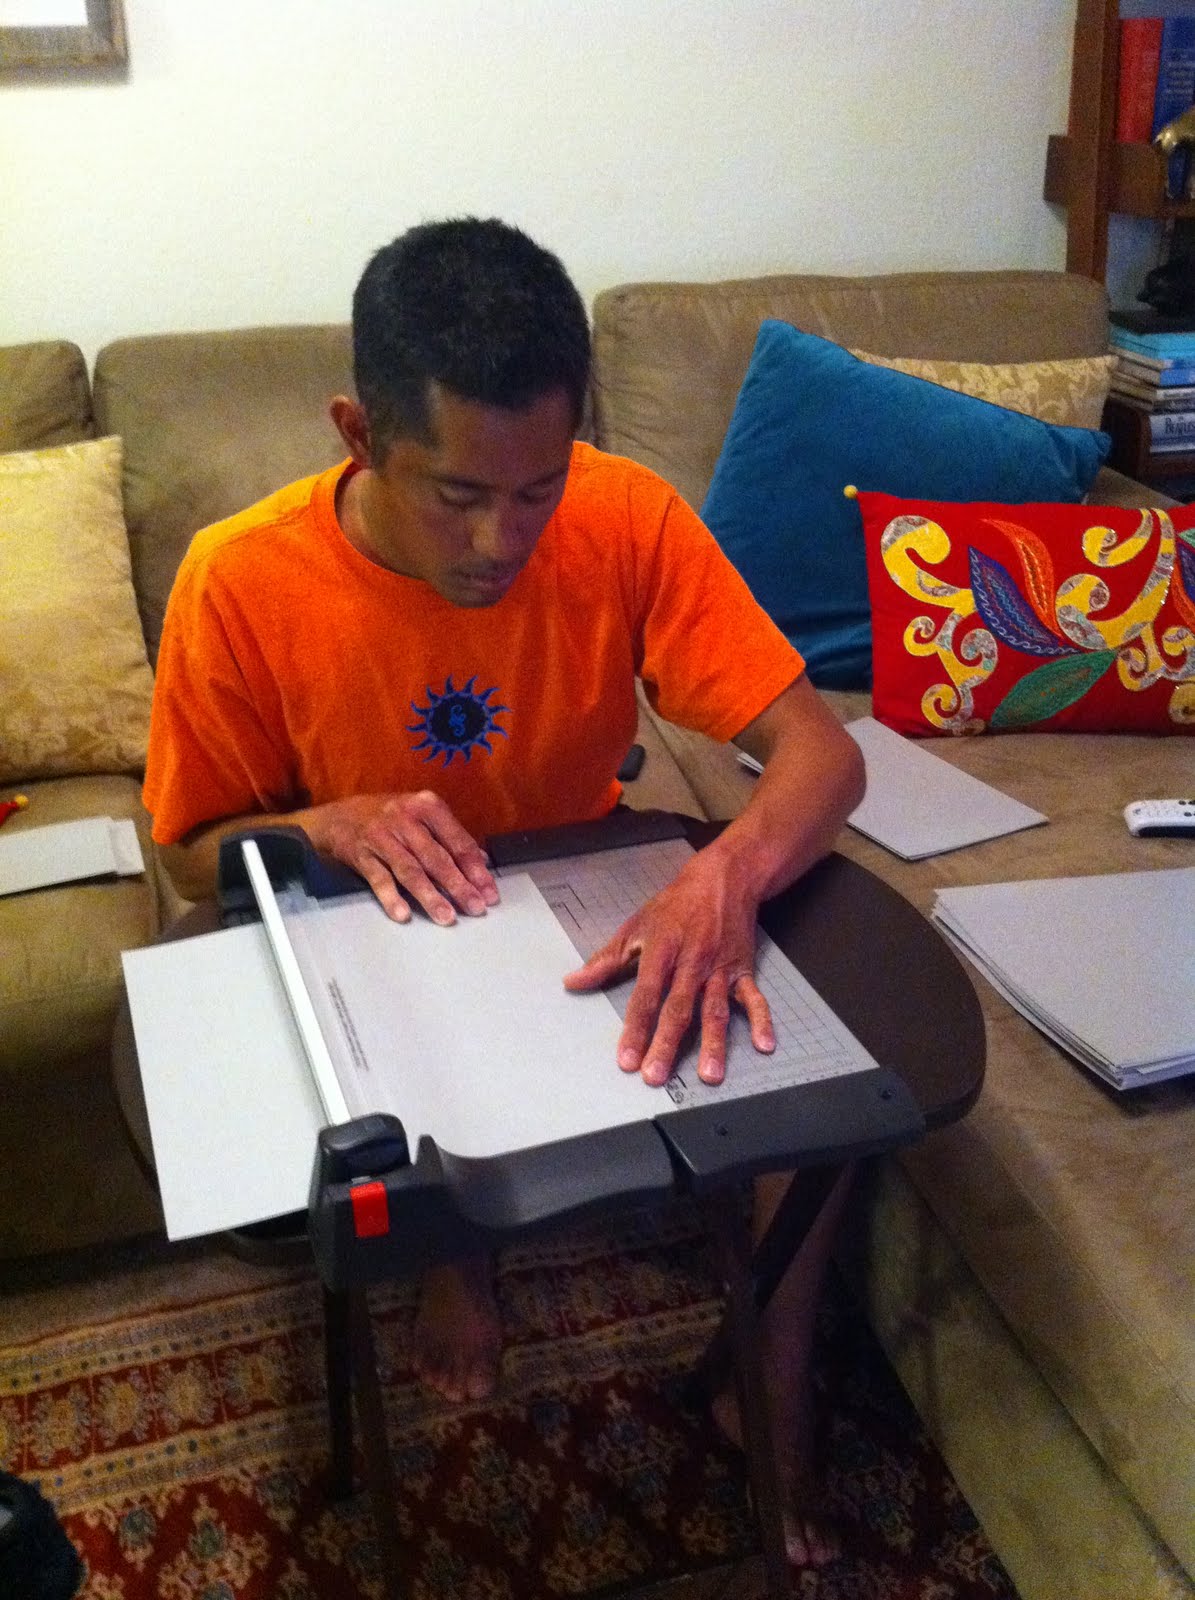
Step 3: Start cutting!
Take all those 12x12 pages and trim them down to size. The first cut should be to the width of your invitations. Ours were 7.5 inches wide, so I modified Mrs. Deviled Egg's tutorial to work for our cards.


{ Mr. Hot Tea demonstrates proper cutting technique }

The next two cuts trim the pocket to size. This time, you want the length of the pocket to equal the width of your folder, plus one inch allowance for the tabs to affix the pocket to the folder. In our case, the length measured 8.5 inches. Then I trimmed the width down an inch so the titles of our RSVP, map, and reception cards would peek over the edge of the pocket.


{ We're a long way from this final look }

Step 3b: Take a break. Seriously. Go for a walk, catch a catnap, or pour yourself a drink. The next step may give you carpal tunnel syndrome - ask Mr. Hot Tea.


Step 4: Get your score on.
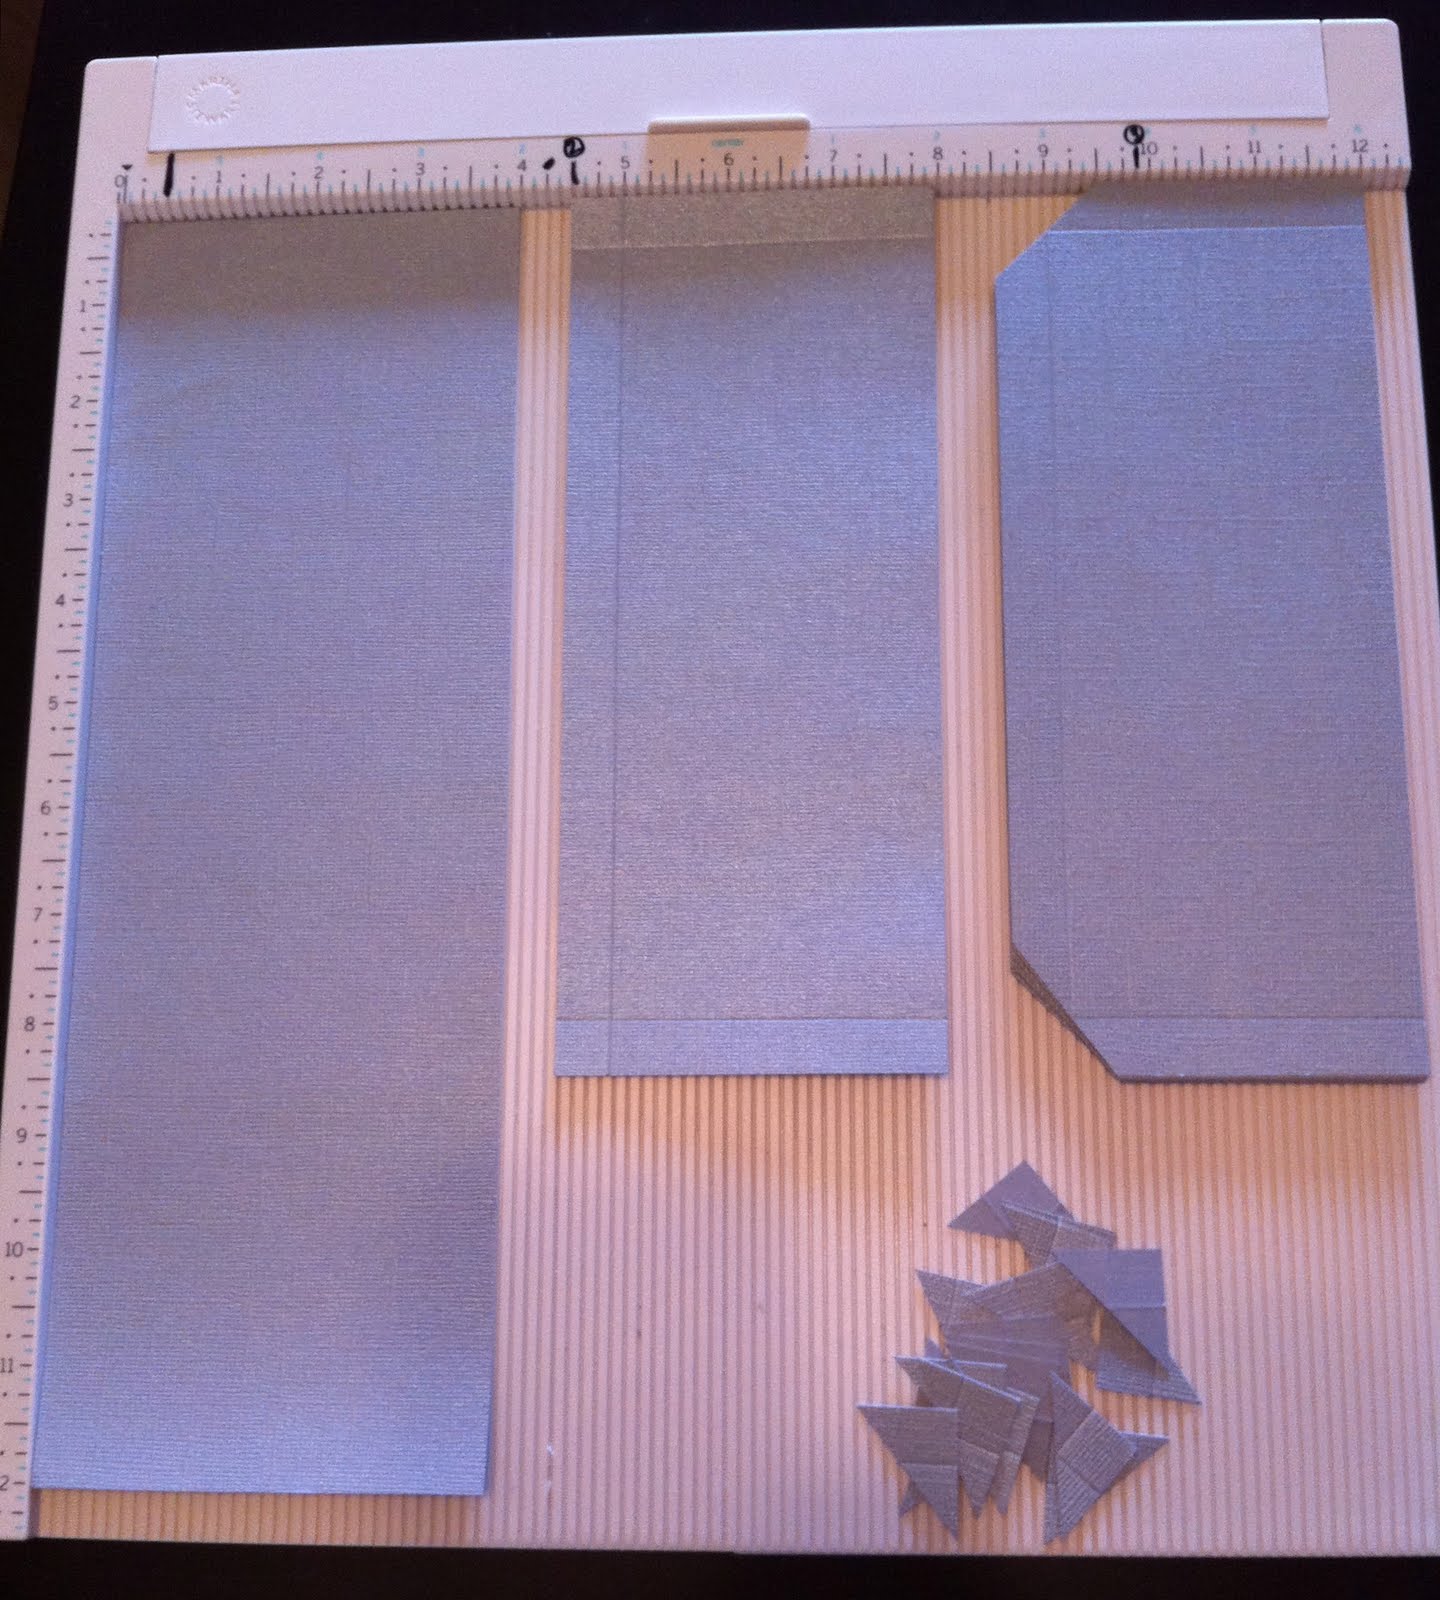
A scoring board and bone folder will earn their keep on this step. Start with the folder, and score twice. You'll want to use a sample invitation card for precise measurements. We scored ours at 2 inches and 7.5 inches. The center panel is where you'll affix the card. Fold along the score lines and use the bone folder to create a crisp crease.


Next up, score the pocket at 0.5 inches on the two short sides and on one long side. Using scissors, cut off the corners where the score lines intersect. This miter will allow the pocket tabs to cleanly fold without overlap. Fold along the score lines and use the bone folder to create a crisp crease.


* quick tips * Mark your scoring board for quick reference. Also, scoring on the outside (the pretty side) will result in less cracking of the paper when you fold it.


Step 4b: Break time! Mr. Hot Tea will demonstrate. Note the scored pockets by his side. If that's not unconditional love and support for his fiancee's crazy DIY projects, I don't know what is.


Step 5: Trim the ribbons.
Each ribbon measured 14.5 inches to cover the top flap and allow for overlap onto the invitation panel and the pocket panel. I chose sheer pink ribbon with a scalloped edge plus lilac satin ribbon for a pop of fun color. It also helped to attach the ribbons together pre-assembly for a smoother finish.


Step 6: Admire your pocketfold prep work! 


Oh yes, all that work for those three little pieces. Next up, assembly time . . .

What part of your invitation suite will you DIY? Any tips to add to the process I've outlined above to prep the pocketfolds?

Monday, August 22

The Teacup Invites Have Landed - Our Reveal!

My previous invite post was necessarily a tease, but no more! We've given our guests over a week to receive them and now it's your turn to see. I'll let the pictures do the talking. . .


{ The wrap-around labels are similar to those of our STDs, & I love the cake stamp! }


{ Oohh, lookee! What is that pop of color? }


{ DIY pocketfold out and turned around, ready to be opened }


{ Crappy iPhone photo, sorry }


{ Vera Wang "Embossed Lotus Scallop" invitations, printed by Papyrus }


{ RSVP response cards printed on Staples embossed cards, DIY style }

We asked our guests to "give advice, request a song, or draw a picture" on the blank side of the response card. I thought it would be a cute keepsake, and the success rate has been about 50/50.


Vera Wang "Embossed Lotus Scallop" reception cards, also printed by Papyrus }

The reception card gives you a better idea of the styling. I chose 2-color thermography since the cost wasn't much more than digital printing.


{ Front and back of the map card printed on pink parchment, DIY style }


{ Another look at the full suite }

I'll admit that I bit off a little more than I could chew with this wedding project. The DIY wraparound labels, pocketfolds, personalized RSVP cards, and maps took what felt like forever to print and assemble. Every spare moment for the better part of two weeks was spent by myself, with a few friends or Mr. Hot Tea late into the night -- or morning! -- on paper crafting. 

DIY-ing our invitations probably didn't save us any money and it definitely cost a lot of my time. I learned a lot of tips through trial and error and will share them in an upcoming tutorial. In the end, I can't tell you how relieved and proud I felt to get these finished!

 Will/did you DIY any part of your invites? How did you feel when you completed your project?  And what did you discover in the process?

Tuesday, August 16

The Teacup Invites Have Left the Building

Can you believe it? Neither can I, it's a miracle they made it in the mail! Here's proof of my success, happily nestled in the Fizz & Frills marketplace bag. Yay, recycling!


Ladies, I won't lie - the past few weeks have been incredibly hectic. It doesn't help that I'm a terrible multi-tasker. Shedding for the wedding, invitations, and my bachelorette weekend all converged last Thursday. Although I wish it were effortless, I managed to keep my peak stress levels to a minimum. A girl can fantasize, right?


I logged some heavy DIY hours on these babies and managed to finish them at 4am on the morning of my departure for Las Vegas after work. It will be a few days before the full reveal to allow all our guests to receive their invites. Until then, here are some sneak peeks.


{ Calling in for backup from Mr. Hot Tea }


{ What a glorious mess! }


{ DIY assembly line, notice all the unfinished ones }


{ Finally! It's been too long since we've seen a clean dining table. }


{ This, multiplied 140 times }

I promise you won't have to wait long to see the suite, and until then I have stories galore of my weight loss progress ( already 4 lbs. in 2 weeks) and my Vegas bachelorette weekend. There's so much good stuff to share I can hardly stand it, stay tuned!

Sunday, July 31

Kicking Up My Heels, DIY Style

I'm starting to feel time compress like this downward spiral.


Image via SiliconAngle

{Isn't that a cool image? I love me some google searching!}

Anyway, it's high time to buckle down and get to work on our invitations. They came in more than two months ago and are sitting in boxes waiting for a loving someone to show them the light of day. So I did what any rational procrastinator would do on a free Sunday afternoon and focused all my effort and attention . . . on something else.

But not to worry, I promise that it was a wedding related project. Remember these lovelies?


{personal photo}

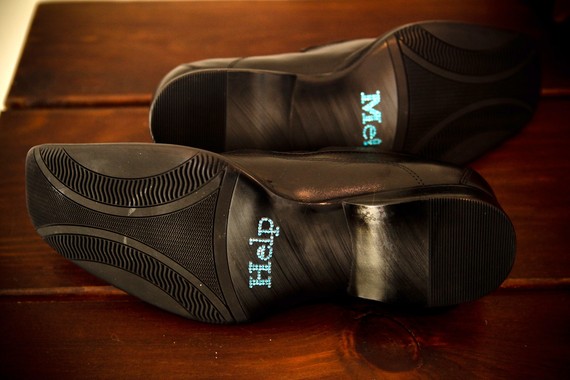
The sequin-covered topside makes me swoon every time I see them. The soles, on the other hand, were lacking a certain sparkle. You DIY-brides know what I'm talking about. 'I do' stickers! Inspiration abounds with a quick internet image search.


Image via Project Wedding / Photo credit: Jenny GG


Image via Lovely Bride

Super duper cute, right? And how adorable is the second photo as her 'something blue' with the added bonus of well wishes from her bridesmaids? You can bet that we can also find fellow brides on the message boards who are in on the sweetness.


icedchaitea via Weddingbee Boards


Mrs.tobe via Weddingbee Boards

An Etsy.com search yields over 80 options for 'I do' stickers. Grooms can also get in on the action and even go so far as to announce cold feet quite literally! 


Image and design via Forweddingssake


Image and design PrettyThisPrettyThat


Image and design MonAmourBoutique

With so many inspirations and options to choose from, this should be a no-brainer, right? Except with what you already know about me, I must find a way to complicate even a seemingly straightforward project. So I started my search at Michael's for the perfect stickers. There are at least 10 stores within my work geography and you can bet I checked the racks of at least 8 of them.

After finding a font that appealed to me in the right size and with numbers as well as letters (this is not as easy as you might initially think!) I consulted a friend about my choice. She liked them except wished they had more depth. Inspiration struck again at Michael's where I discovered adhesive faux pearl bead embellishments. What if I put them on top of the sticker to get more of a 3-D effect?


{personal photo}

For two hours I plucked those little suckers and stuck them lovingly to 12 letters & numbers. I'll share a quick tutorial in an upcoming post. Until then, here's a peek at the finished product. I'm so pleased with the result!


{the date isn't missing...just blurred out}

Nothing compares to crafting on a lazy Sunday in pajamas, haha! A special thanks goes to Mr. Hot Tea for snapping this shot. Now if only I could magically transform that pile of waiting invitations . . . I guess that's what another Sunday is for.


{sad, sad invites waiting for some love}

What wedding DIY projects are on your list? How do you prioritize which ones to tackle and what's been most rewarding so far? Will you 'I do' your shoes?